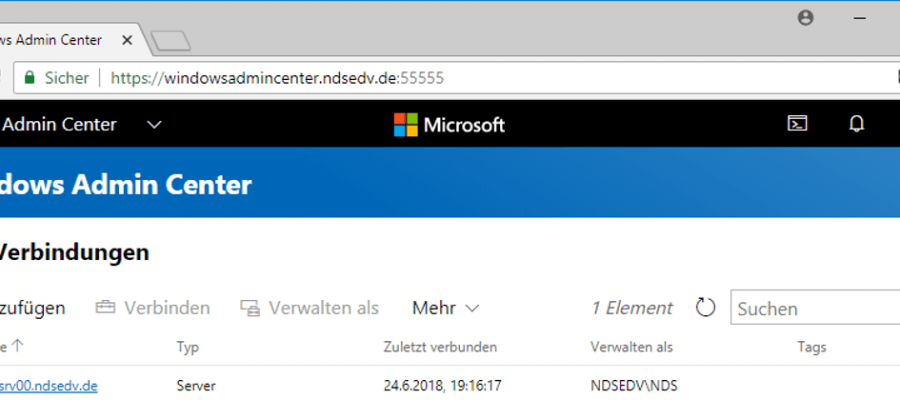
Installationsanleitung Windows Admin Center
Das Windows Admin Center ist eine komplette Neuentwicklung zur zentralisierten Administration von Windows Servern. Das WAC setzt auf Powershell und deren Fähigkeiten, Server per WMI und WS-Management-Schnittstellen zugänglich zu machen.
In diesem Dokument gehe ich auf die Installation ein und zeige euch, was alles eingerichtet werden muss, um das WAC sicher betreiben zu können.
Die Installation setzt als Basis ein Windows 10 v1709 oder Windows Server 2016 v1709 voraus. Damit sich ein Server über das WAC remote verwalten lässt, muss die Funktion zunächst auf dem/den Zielserver(n) aktiviert werden. In einer Domäne setzen wir natürlich auf Gruppenrichtlinien.
Update der Anleitung 28.07.2018
Windows Admin Center Honolulu installieren
Windows Remote Management (WinRM)
Firewall Port für https setzen:
netsh advfirewall firewall add rule name=”Windows Remote Management (HTTPS-In)” protocol=TCP dir=in localport=5986 action=allow
New-NetFirewallRule -DisplayName “Windows Remote Management (HTTPS-In)” -Name “Windows Remote Management (HTTPS-In)” -Profile Any -LocalPort 5986 -Protocol TCP
netsh advfirewall firewall set rule group=”Remote Administration” new enable=yes
netsh advfirewall firewall set rule group=”Windows Remote Management” new enable=yes
netsh advfirewall firewall set rule group=”Windows Management Instrumentation (wmi)” new enable=yes
Firewall Regeln abfragen:
Get-NetFirewallRule WINRM-HTTP-In-TCP* | fl Name,DisplayName,Enabled
Test-NetConnection -computername SRV01 -port 3389
Test-NetConnection -computername SRV01 -CommonTCPPort RDP
WinRM Schnellkonfiguration:
winrm quickconfig -transport:https
Enable-PSRemoting
WinRM Remote Konfiguration:
psexec \\ComputerName -s winrm.cmd quickconfig –q
psexec @c:\PCs.txt -s winrm.cmd quickconfig –q
winrm get wmicimv2/Win32_Service?Name=WinRM -r:SRV00
HTTPS Listener einrichten:
winrm create winrm/config/Listener?Address=*+Transport=HTTPS @{Hostname=”WindowsAdminCenter”; CertificateThumbprint=”93ed28bb2d9d15f9cb80a8ab82c7bb1325e731e5″}
Set-WsmanQuickConfig –UseSSL
HTTPS Listener löschen:
winrm delete winrm/config/Listener?Address=*+Transport=http
Remote Port testen:
Test-NetConnection -ComputerName SRV00 –Port 5986
Remote Verbindung aufbauen:
Enter-PSSession -ComputerName SRV00
$options=New-PSSessionOption -SkipCACheck –SkipCNCheck
Enter-PSSession -ComputerName SRV00-Credential NDS -UseSSL -SessionOption $options
Zertifikat zuweisen:
winrm set winrm/config/service @{CertificateThumbprint=”93ed28bb2d9d15f9cb80a8ab82c7bb1325e731e5″}
Alle Zertifikate auslesen:
Get-ChildItem -Path cert: -Recurse | select Subject, FriendlyName, Thumbprint | Format-List
Alle lokalen Computerzertifikate auslesen:
Get-ChildItem -path cert:\LocalMachine\My
Lokale Port WSMan auslesen:
Get-ChildItem WSMan:\localhost\Client\DefaultPorts
WSMan prüfen:
Test-WSMan -Computername IssuingCA –UserSSL
“DC01″,”DC022” | foreach{$_; Test-WsMan $_}
Powershell Berechtigungen auslesen:
(Get-PSSessionConfiguration
-Name Microsoft.PowerShell).Permission
(Get-PSSessionConfiguration -Name “Microsoft.PowerShell”).SecurityDescriptorSDDL
Berechtigungen hinzufügen:
net localgroup “Remote Management Users” /add Joern
Set-PSSessionConfiguration -Name Microsoft.PowerShell –showSecurityDescriptorUI
Berechtigungen anhand des SDDl Strings setzen:
(Get-PSSessionConfiguration -Name “Microsoft.PowerShell”).SecurityDescriptorSDDL
Set-PSSessionConfiguration -Name Microsoft.PowerShell -SecurityDescriptorSddl $SDDL
$SDDL = O:NSG:BAD:P(A;;GA;;;BA)(A;;GA;;;IU)(A;;GA;;;RM)S:P(AU;FA;GA;;;WD)(AU;SA;GXGW;;;WD)
Vertrauensstellung:
winrm set winrm/config/client/auth ‘@{Basic=”true”}’
winrm set winrm/config/service/auth ‘@{Basic=”true”}’
winrm set winrm/config/service ‘@{AllowUnencrypted=”true”}’
Domänen-Vertrauensstellung testen:
$Credential = Get-Credential
Test-ComputerSecureChannel -Repair -Credential $Credential
Reset-ComputerMachinePassword
WINRM komplette lokale Konfiguration CMD:
winrm quickconfig –q
winrm set winrm/config/winrs ‘@{MaxMemoryPerShellMB=”512″}’
winrm set winrm/config ‘@{MaxTimeoutms=”1800000″}’
winrm set winrm/config/service ‘@{AllowUnencrypted=”true”}’
winrm set winrm/config/service/auth ‘@{Basic=”true”}’
Start-Service WinRM
SetSservice WinRM -StartupType Automatic
Set-ExecutionPolicy Unrestricted
WINRM komplette lokale Konfiguration Powershell:
# Rückbau > Deaktivieren
Start-Service winrm
winrm invoke restore winrm/config
Disable-PSRemoting –Force
Disable-WSManCredSSP -Role Client
Disable-WSManCredSSP -Role Server
Stop-Service winrm
# Aufbau > Aktivieren
Enable-PSRemoting –Force
Enable-WSManCredSSP -Role Server –Force
Enable-WSManCredSSP -Role Client -DelegateComputer “*” –Force
winrm enumerate winrm/config/listener
Selbstsigniertes Zertifikat erstellen und Listener setzen:
$c = New-SelfSignedCertificate -DnsName “SRV00.ndsedv.de” -CertStoreLocation cert:\LocalMachine\My
winrm create winrm/config/Listener?Address=*+Transport=HTTPS “@{Hostname=`” SRV00.ndsedv.de`”;CertificateThumbprint=`”$($c.ThumbPrint)`”}”
Remote Desktop Connection abfragen:
Get-ItemProperty “HKLM:\System\CurrentControlSet\Control\Terminal Server” -name “fDenyTSConnections” | fl fDeny*
Set-ItemProperty “HKLM:\System\CurrentControlSet\Control\Terminal Server” -name “fDenyTSConnections” -value 0
WSMAN SPN setzen:
Setspn -L ndsedv.de\SRV00
Setspn -A WSMAN\SRV00 ndsedv.de\SRV00
Setspn -A WSMAN\SRV00.ndsedv.de ndsedv.de\SRV00
Serverliste für den Import erstellen:
Get-ADComputer -SearchBase “OU=Server,OU=Machines,OU=ORG,DC=ndsedv,DC=de” -Filter “*” | %{ $_.Name | Out-File -FilePath C:\Temp\Server.txt -Append }

